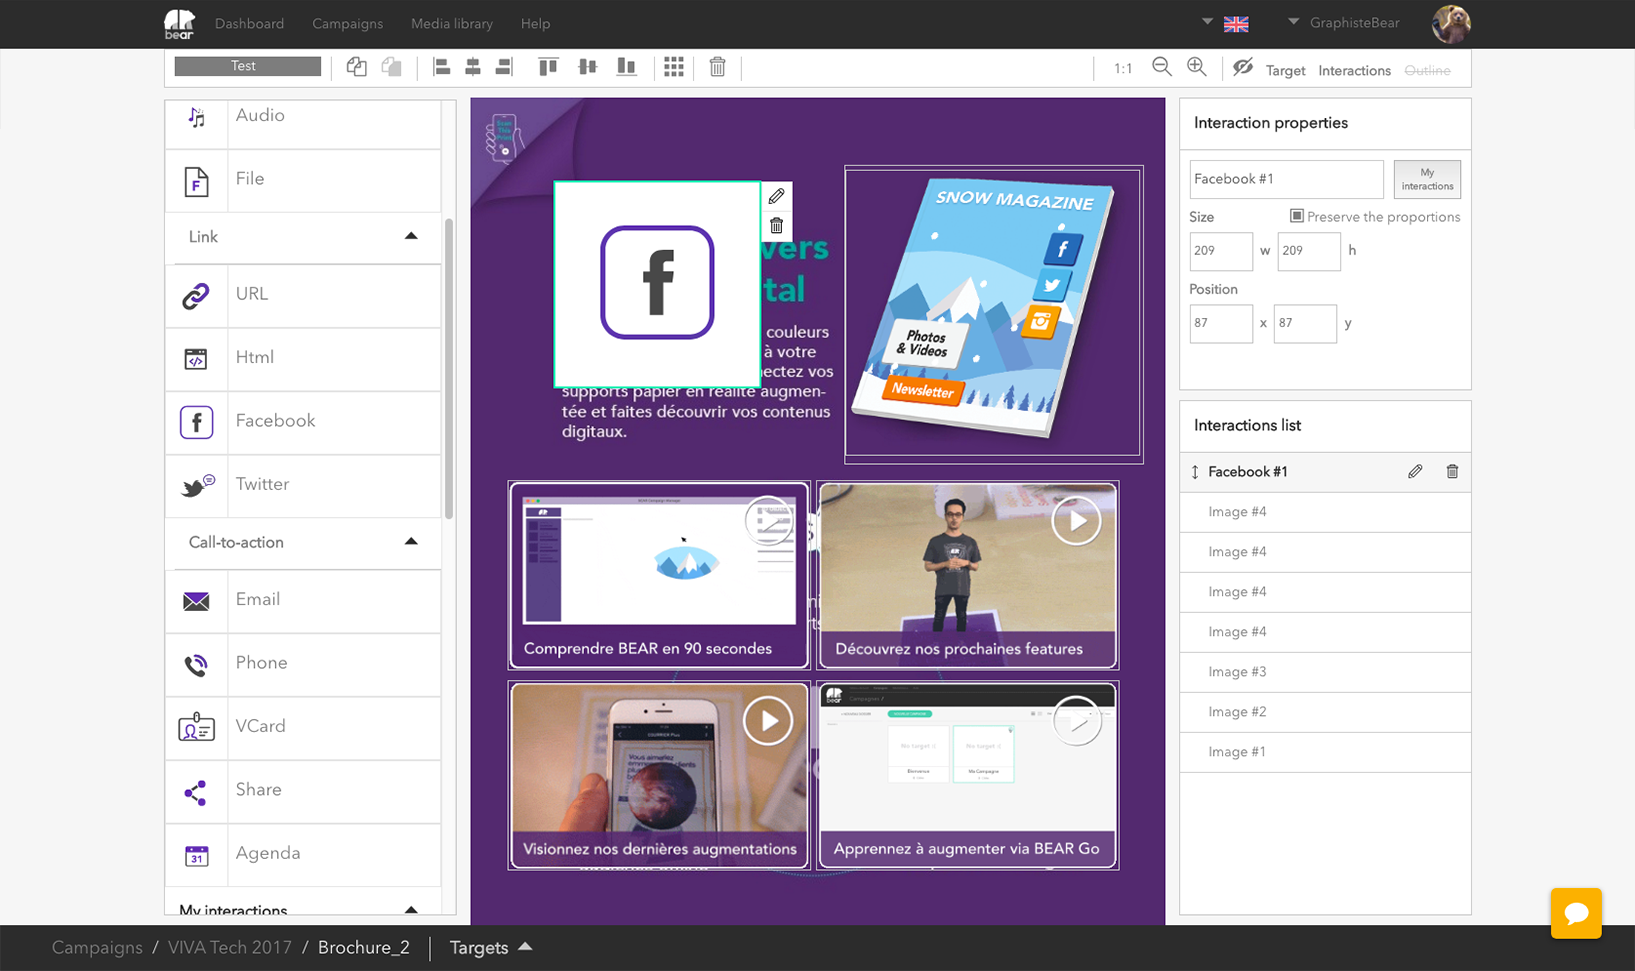
The interactions screen is divided into three areas: the right area lists the current interactions of the target you are viewing, the middle area displays the current target you want to augment and, finally, the left part lists all different interactions available.
To add an interaction, just drag and drop one of the icons located in the left column. Once the button is positioned on your target, you may change its position and size by pulling corners. For better precision you can also enter the position coordinates and size values in the interaction properties. If you intend to regularly use an interaction with same parameters, we advise you to take advantage of the ‘My interactions’ button.
Interactions saved in this section will be applied to new targets with the same editing and positioning parameters.
Editing an interaction
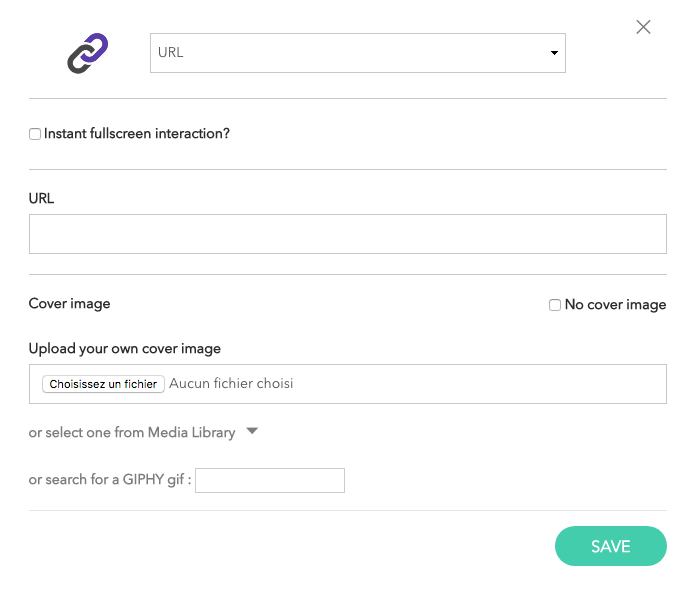
Once your interaction is positioned, you can edit its parameters by clicking on the pen to the right or by double clicking on the icon. For example, an URL interaction can be configured by the ‘cover image’ which will be displayed in augmented reality over the target, and the page URL mobile users will be redirected to when clicking on it.
Cover images that will show by default after a scan are interaction-specific purple icons over gray background. You may choose to replace them by uploading a new image, selecting an image from your Media library or by using the Giphy search box. Instead of uploading an image, you may also drag and drop image files from your computer desktop to the main interactions view in the browser.
You can also choose the ‘no cover image’ option in which case nothing will show on mobile app screen but the area covered by the interaction will remain clickable.
Instant full screen
Use the ‘instant full screen’ option if you do not want to view interactions in augmented reality and you prefer launching a fullscreen page just after scan. This option is only available for URL, HTML, Video and Audio interactions.
Enabling this mode for a specific interaction will hide all other interactions that may have been created on the target.
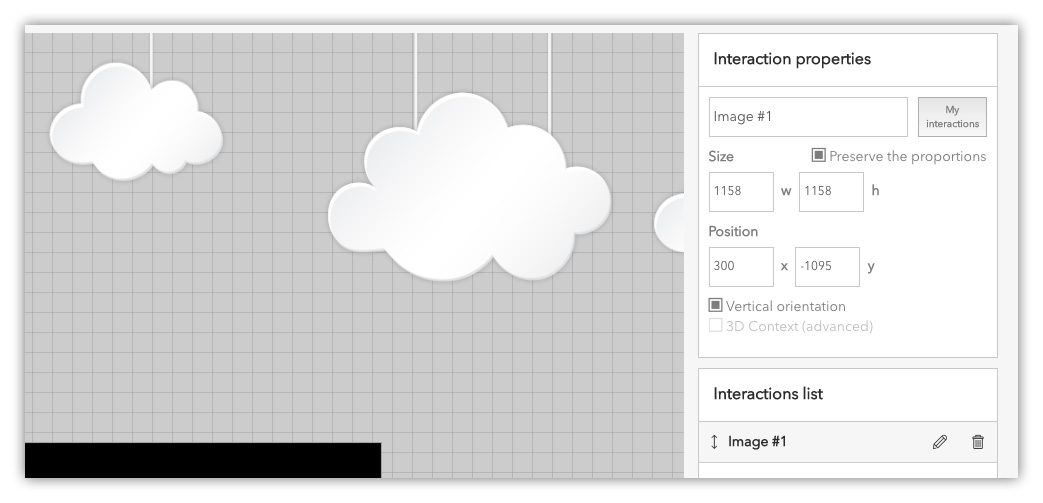
Vertical orientation
If you don’t have 3D content available for your campaign -which usually comes with a higher production cost- we recommend you to take advantage of the ‘vertical orientation’ option. This will work for 2D interactions, including animated GIFs, and provide your mobile users with a 3D immersive effect.

Additional options for video interactions
You may want to use the ‘auto-play on texture’ feature for a more immersive video rendering. Unlike full-screen playback which is activated by default, on-texture video will play instantly, hooked to the target image, just after target recognition. Tapping on the video in the mobile app will pause or restart playback. At the end of the video, mobile users can start playback again by tapping the play button, or you may either want to use the ‘loop’ option in the front-end to play endless videos. On-texture videos coexist with other interactions on a target and let you, for instance, add a sound environment to the augmented reality scene.
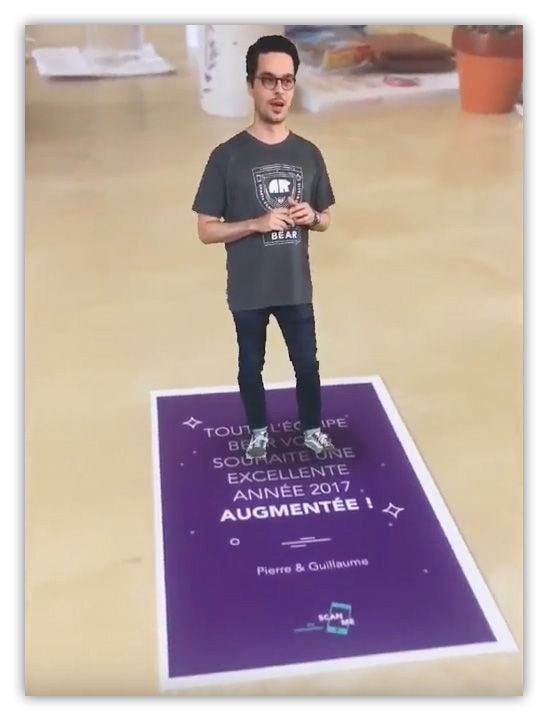
It is possible to delete, mobile side, the background color of an on-texture video for an even more immersive effect. When activating the vertical orientation option for a transparent video, you will get a holographic-like rendering. That’s why we call ‘HoloBear’ the combination of following options: video interaction + auto-play on texture + transparency color + vertical orientation. HoloBear rendering is highly relevant for playing a character-centered video: interview, product demonstration, … Wow effect guaranteed!