What is it ?
Reco Areas are areas that user can create and modify. They consist in areas in the marker that will be used by BIRS ( Bear Image Recognition System). If a marker has reco areas, they will be the only source used to identify and track the marker. This eases a lot the production process of augmentation of complex markers (newspaper…), where multiple markers often have identical headers, footers, blocks… These elements can be considered as duplicates and can cause unexpected behavior.
Reco Areas will “crop” the area used by BIRS, allowing to discard unwanted parts of the markers. This will speed up – a lot – the process of doing image manipulation with photoshop-gimp… to remove problematic parts of the marker.
How does it work ?
First of all, you need a marker and its page_id. To compute area coordinates, usage of scale conversion formula is needed. You need : reco area x, y, width and height relative to marker size. Pseudocode :
maxSide = max(markerWidth, markerHeight);
rx = (x + max(0,markerHeight - markerWidth)/2) / maxSide - 0.5;
ry = (y + max(0,markerWidth - markerHeight)/2) / maxSide - 0.5;
rwidth = width / maxSide;
rheight = height / maxSide;
rx += (rwidth / 2);
ry += (rheight / 2) ;
Reco areas coordinate system
All the coordinates are relative to the markers biggest side.
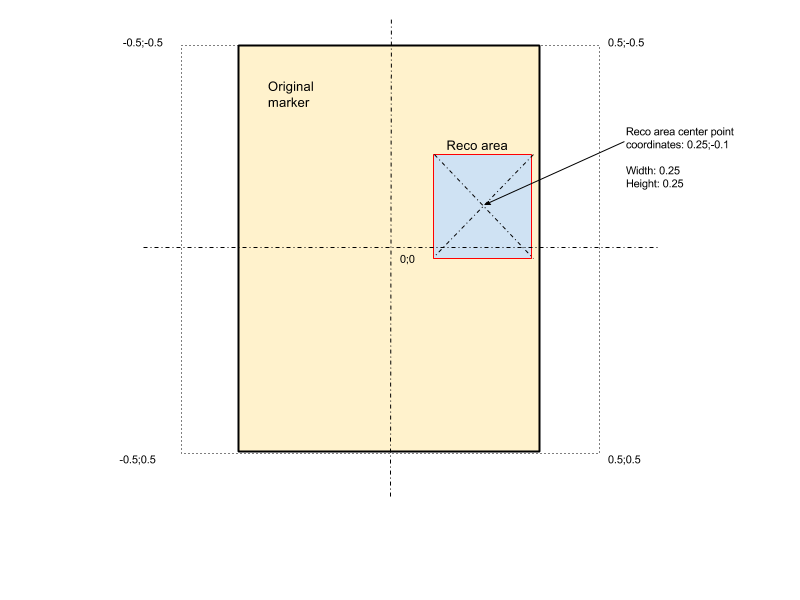
API calls:
Create reco area: POST api.bear2b.com/reco_areas Parameters:
| name | description |
|---|---|
| page_id | Marker ID |
| cx | Reco area’s center point X coordinate |
| cy | Reco area’s center point Y coordinate |
| width | Reco area’s width |
| height | Reco area’s height |
In case of success new reco area created and attached to original marker. Response:
| id | Reco area’s ID |
|---|---|
| page_id | Marker ID |
| area_target_id | Reco area unique ID used in recognition |
| cx | Reco area’s center point X coordinate |
| cy | Reco area’s center point Y coordinate |
| width | Reco area’s width |
| height | Reco area’s height |
| image | Path to the reco area image |
Update reco area: PUT api.bear2b.com/reco_areas
Parameters:
| name | description |
|---|---|
| id | Reco area’s ID |
| cx | Reco area’s center point X coordinate |
| cy | Reco area’s center point Y coordinate |
| width | Reco area’s width |
| height | Reco area’s height |
Response:
| name | description |
|---|---|
| id | Reco area’s ID |
| page_id | Marker ID |
| area_target_id | Reco area unique ID used in recognition |
| cx | Reco area’s center point X coordinate |
| cy | Reco area’s center point Y coordinate |
| width | Reco area’s width |
| height | Reco area’s height |
| image | Path to the reco area image |
Delete reco area: PUT api.bear2b.com/reco_areas
Parameters:
| name | description |
|---|---|
| id | Reco area’s ID |
Get all reco areas for the specified marker: GET api.bear2b.com/reco_areas
Parameters:
| name | description |
|---|---|
| page_id | Marker ID |
Response: Array of objects:
| name | description |
|---|---|
| id | Reco area’s ID |
| page_id | Marker ID |
| area_target_id | Reco area unique ID used in recognition |
| cx | Reco area’s center point X coordinate |
| cy | Reco area’s center point Y coordinate |
| width | Reco area’s width |
| height | Reco area’s height |
| image | Path to the reco area image |
Example

For these markers we can observe that there are “duplicate warning” displayed by BIRS. To avoid them we’ll create two reco areas per marker.
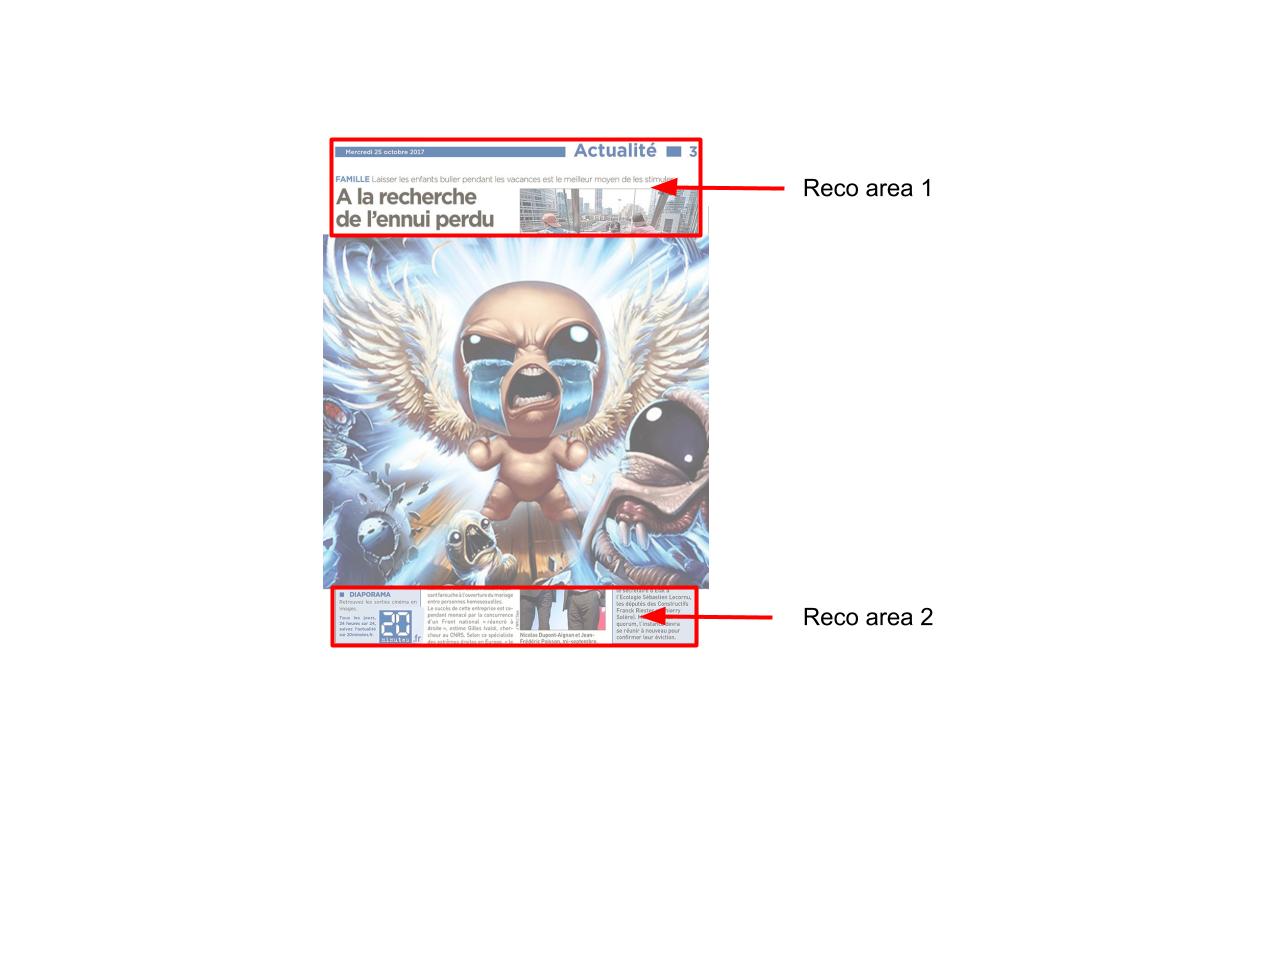
Our marker having dimensions of 529x699px, for the top reco area, our first reco area top left corner needs to be at x = 0, y = 0, having a width of 529 and height of ~135.
We apply the pseudocode:
maxSide = max(529, 699); // => 699
rx = (0 + max(0,699 - 529)/2) / 699 - 0.5; // => ~ -0,378397711
ry = (0 + max(0,529 - 699)/2) / 699 - 0.5; // => -0,5
rwidth = 529 / 699; // => 0,756795422
rheight = 135 / 699; // => 0,1931330472
rx += (rwidth / 2); // => 0
ry += (rheight / 2) ; // => -0,4034334764
Then we can do the API call with our new data, supposing that page_id is 42
api.bear2b.com/reco_areas-post.php?page_id=42&cx=0&cy=-0.4034334764&width=0.756795422&height=0.1931330472
We repeat same operation for the bottom reco area.
GO BEAR
The ability to create a single reco area will be available soon in our platform. It allows to create reco areas easily.
Once a marker has been created, you can open the edit recognition parameters modal.
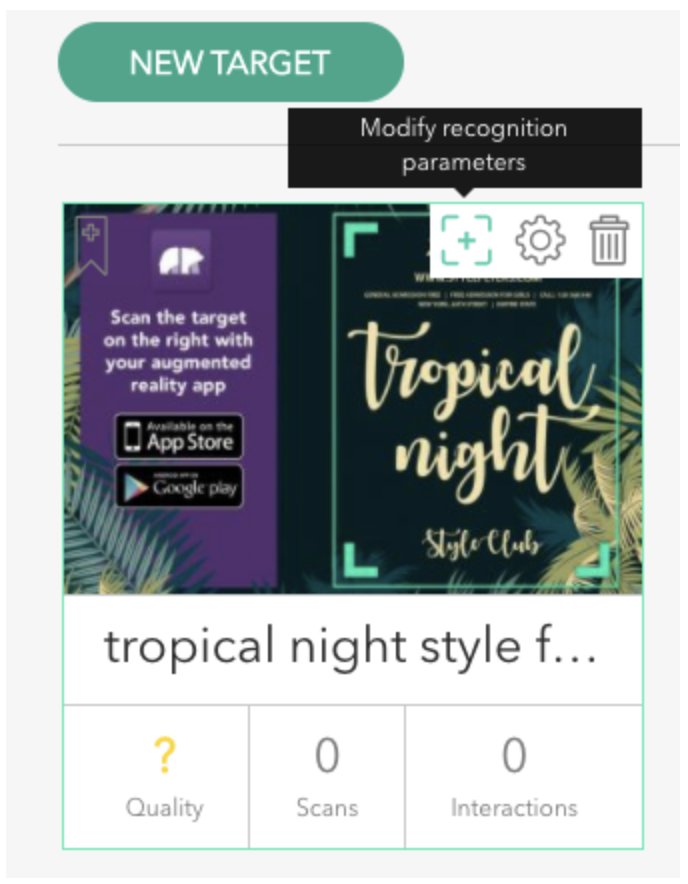
Then you can click the “crop” button.
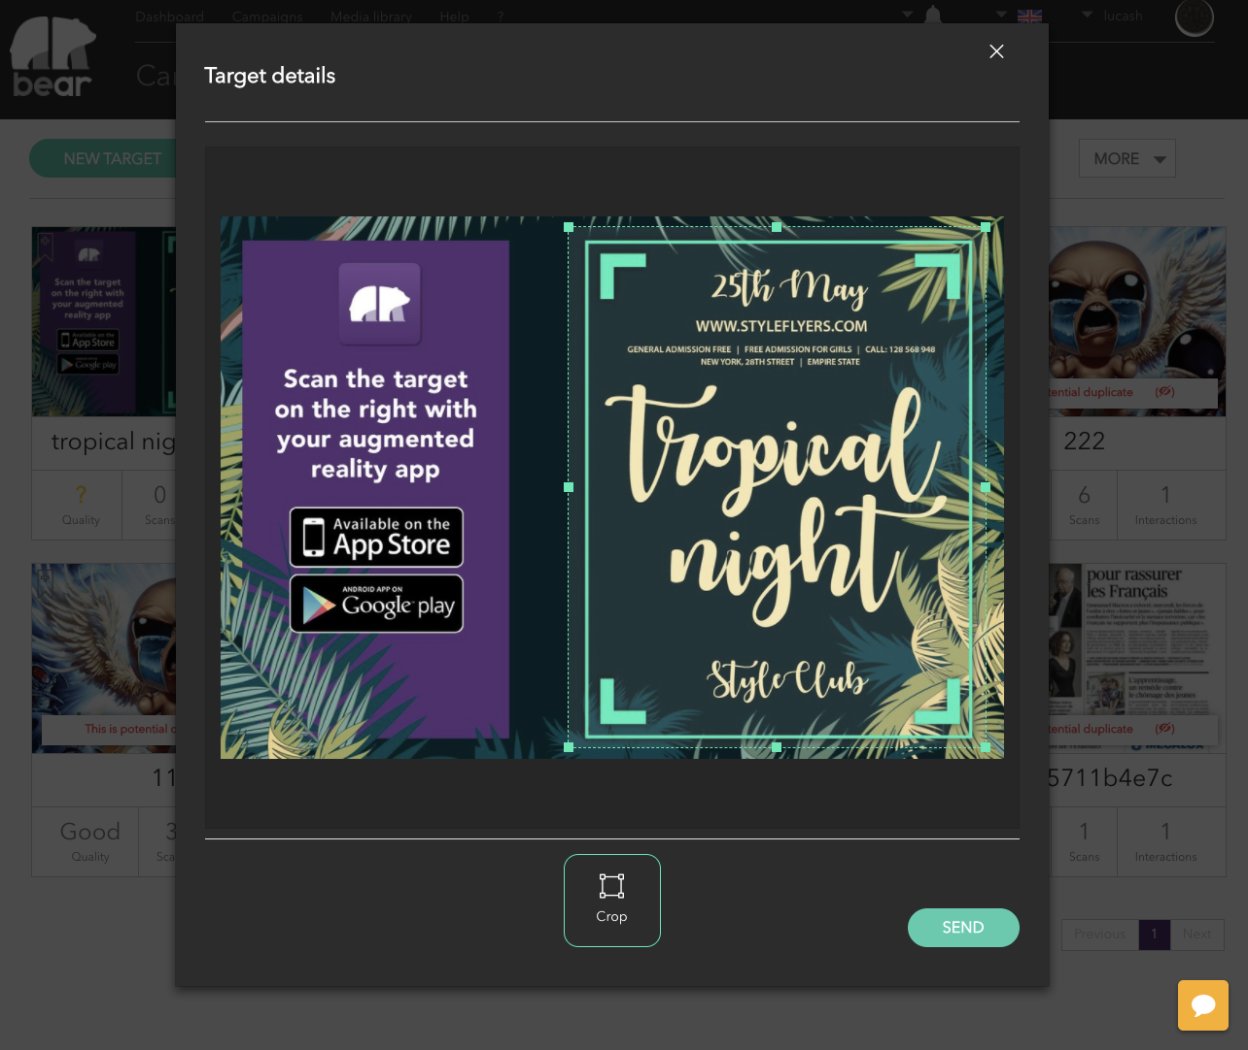
Then, a resizable box appears, that represents the reco area. Here we just use the header title, and not the logo “20 minutes” of the newspaper. We hit Save, and the call generated is :
api.bear2b.com/reco_areas-post.php?page_id=42&cx=0.09514&cy=-0.40486&width=0.552217&height=0.178827
GO will allow modification of one single reco area. Support for multiple reco areas will be available soon.